Showing posts with label Ipad. Show all posts
Thursday, August 18, 2011

How To Jailbreak iPad 1 Using Redsn0w For iOS 4.3.5 [Windows / Mac]

0 comments


Apple released iOS 4.3.5 earlier in the week to fix the security vulnerability with certification validation.


iPhone Dev team released Redsn0w, which allows iPad 1 users to jailbreak iOS 4.3.4 and it also works for iOS 4.3.5 (tethered).


In this guide, we will take you through the step by step procedure to jailbreak iPad on iOS 4.3.5 using Redsn0w.


Here are some important points to note before you proceed.


This guide is meant for iPad 1 users only. This guide is not meant for iPhone. iPod Touch users can checkout this step-by-step guide, while iPhone users can checkout this step-by-step guide.

Redsn0w 0.9.8b4 only supports a tethered jailbreak, which means that you need to connect your iOS device to the computer on every reboot.

Please note that jailbreaking your iPad may void your warranty and hence proceed with caution and at your own risk.

Please do not forget to backup your iPad before you proceed. You can refer to this post for instructions on how to backup your iPad.

If you've jailbroken your iPhone then you can use jailbreak apps such as AptBackup, PkgBackup or xBackup from Cydia to take a backup of all the jailbreak apps and tweaks so you can reinstall them easily after successfully jailbreaking your iPhone rather then installing them individually.

After the jailbreaking process is complete, do not forget to checkout our article on tips to keep your iPad secure.

Please ensure you are running latest version of iTunes i.e. iTunes 10.2 or later.

Redsn0w 0.9.8b4 doesn't support iPad 2.

If you are on iOS 4.3.3 then you can use JailbreakMe 3.0, which is one of the easiest tools to jailbreak iPad, which supports a untethered jailbreak. You can checkout this post for instructions.

You can follow these step-by-step instructions to jailbreak your iPad 1:

Step 1: Download Redsn0w 0.9.8b4 (Mac and Windows) and save the application in a folder named "Redsn0w" on your desktop.

Step 2: You need to download both the iOS 4.3.4 and iOS 4.3.5 firmware files (use Firefox or Chrome to download the firmware file instead of using Internet Explorer or Safari):

iOS 4.3.4 firmware file for iPad 1 (iPad1,1_4.3.4_8K2_Restore.ipsw)

iOS 4.3.5 firmware file for iPad 1 (iPad1,1_4.3.5_8L1_Restore.ipsw)

Step 3: Double click the Redsn0w zip file and extract the application to the Redsn0w folder.

Step 4: Connect your iPad to the computer, which should automatically launch iTunes.

Skip steps 5 and 6, if your iPad has already been upgraded to iOS 4.3.5.

Step 5: From the 'Devices' section on the left pane of iTunes, select your iPad device. Now, hold down the Shift button (Option button for Mac users) and click the 'Restore' button.

Step 6: Navigate to the Redsn0w folder on the desktop and select the downloaded iOS 4.3.5 firmware file (iPad1,1_4.3.5_8L1_Restore.ipsw). Click on the 'Choose' button to let iTunes update your iPhone with the required firmware. You will be asked to setup your iPad 1 either from a previous backup or setup as a new iPad, select the backup you want for your device (ideally should be the most recent one). Wait for iTunes to finish.

Step 7: Navigate back to the Redsn0w folder and launch the Redsn0w application. Windows 7 users should run the exe in Windows XP compatibility mode (right-click on the Redsn0w exe and select Properties, then select the Compatibility tab and select Run this program in compatibility mode for Windows XP). Windows XP and Windows 7 users should run Redsn0w as ‘Administrator’ (right-click on the Redsn0w exe and select 'Run as an Administrator').

Step 8: You will be asked to select the corresponding IPSW file. Click on the Browse button and select the iOS 4.3.4 firmware file (iPad1,1_4.3.4_8K2_Restore.ipsw). Note: iOS 4.3.4 firmware file and not the iOS 4.3.5 firmware file.

Step 9: Redsn0w will verify the firmware file and inform you if it has successfully identified it. Click on 'Next' to proceed.

Step 10: Redsn0w will now start preparing the jailbreak data.

Step 11: You will now be prompted to select the jailbreak options you would like. Make sure Cydia is selected and select 'Next' to continue.

Step 12: You will now be prompted to switch OFF your iPad and plug it to the computer. Follow the instructions and click on 'Next' to move to the next screen:

Step 13: You will now need to put your iPad into the DFU mode. Redsn0w will take you through the necessary steps:

(a) Hold the Power button on iPad down for 3 seconds:

(b) Now simultaneously hold the iPad and keep the two buttons pressed for 10 seconds:

(c) Now release the Power button while keeping the Home button pressed until Redsn0w identifies the device:

Step 14: Your iPad should reboot now. Please remember to release the Home button.

Step 15: Redsn0w will now begin uploading the new RAM disk and kernel.

Step 16: You will now be notified once the jailbreaking process is complete. Click on the 'Finish' button to exit the application.

Step 17: Your iPad will reboot once again (which could take approximately 5 minutes). After it has rebooted, your iPad should be successfully jailbroken. You should find Cydia jailbreak app on your iPad’s home screen.

If you're new to the jailbreaking world and wondering what to do after jailbreaking your iPad, checkout our jailbreak apps category page to find out the apps you can install on your iPad using the Cydia app.

Note: Once Redsn0w has finished jailbreaking your iPad, you will need to boot it tethered. All you need to do is rerun Redsn0w and this time select Just boot tethered right now from the list of options instead of installing Cydia.

Hope this helped. Please don't forget to let us know how it goes in the comments.
Read more...
Sunday, July 24, 2011

OS X Lion LaunchPad / iPad Launcher on Windows 7

0 comments
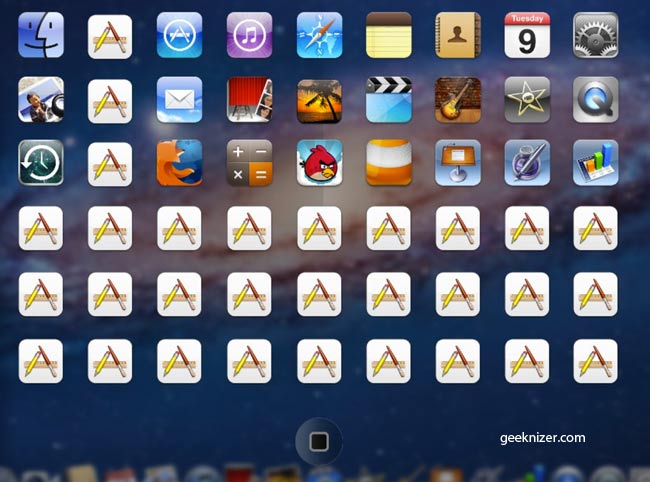
Windows 7 users are craving to get their handson on the OS X Lion’s amazing features especially the iPad launcher like Launchpad.
iPad Launcher of Windows 7 gives you the chance to try Launcher on Windows 7. It also allows you to lock the desktop icons without forcing users to log off. You can also customize the app icons, easily.

How to Get OSX Launchpad, iPad Launcher on Windows 7
Step 1. Download and unrar the file and run the exe.
Step 2. You now assign icons by clicking on desired icons. And later customize the icons.
Step 3. Configure locking (optional). This is of course a not very secure way since you can kill the app using task manager and retrieve your desktop.
We write latest and greatest in Tech GuidesAppleiPhoneTabletsAndroid,  Open Source, Latest in Tech, subscribe to us @geeknizer on Twitter OR on Facebook Fanpage:
Read more...

How to Downgrade iOS 4.3.4 to 4.3.3, 4.3.2, 4.3.1, 4.3, on iPhone 4, 3GS, iPad, iPod touch?

0 comments
When everybody are running to upgrade and use the best of new features and upcoming versions, there would be freaks and some cool people who would love to remain with the same acquainted version or would like to go downgrade it. One must note that Cydia still have some technical issues, which makes no matter in doing jailbreak every time.
Folks, if you have saved your SHSH blobs of earlier iOS versions, then you can downgrade from iOS 4.3.4 to 4.3.3, 4.3.2, 4.3.3, 4.3 or 4.2.1, these earlier versions without any problem. One must keep in mind that this technique is not applicable to 3G iPad 2 users running iOS 4.3.4, as downgrading of the baseband is not possible on it.
As said that “Old is Gold” and to work in known and familiar version which are tested sound technically is good to use in any circumstances. Hence we come with a step wise simple way to downgrade iOS 4.3.4
STEP 1: First of all download the required IPSW file to which you want to downgrade to from the links given below:-
STEP 2: After selecting the version of downgrading O.S and downloading it’s IPSW file, put your iPhone in DFU Mode in the following way.
  • Get your iPhone connected to the computer.
  • Turn your iPhone device off.
  • Start and launch the iTunes
  • Hold down the Power and Home buttons together simultaneously for approx. 10 seconds
  • Now release the Power button but still keep holding the Home button until your computer doesn’t recognizes a new USB device.
  • iTunes will now recognize your which Apple device you are using whether it may be iPad, iPhone, iPod, etc.
  • Your device’s screen should be off, if that happens so, then you have successfully put your device in DFU mode. But if still iTunes logo shows up, then you are in Recovery Mode, not in the DFU mode.
STEP 3: This is very interesting & important part of downgrading as you are going to prove iTunes Dumb by making it thinking that it’s in contact with Apple’s servers, whereas its gonna to be to changed that to Saurik’s server. This will add Saurik’s Server address to your system’s host file. At this moment iTunes will think it is talking to Apple, while it will be talking to Cydia while the restoring process.
  • For Windows Locate the path as follows: – “C:\Windows\System32\drivers\etc\” and locate its file as hosts.
  • For Mac users can access the “hosts” file by navigating to “/etc/” folder, which can be found through Go > Go to Folder from within Finder
  • Open it in Notepad (for Windows) or TextEdit (for Mac OS X) and add this at the bottom of the file and write the following line at the end of it 74.208.105.171 gs.apple.com and then save it.
N.B:- Whether it is Windows or Mac O.S, do every work as Administrator.
STEP 4: Here you have to restore your Apple Device to iOS 4.1, 4.0.2 or 4.0.1 by clicking on the icon on the left sidebar of iTunes then hold left “alt” button on Mac and Shift button for Windows on the keyboard and then click on “Restore”. Now release alt button and select the iOS 4.1, 4.0.2 or 4.0.1 IPSW file you have already downloaded in Step 1 & then iTunes will do some automated Steps. At this time you have to take breath and don’t do any silly things. Your Apple Device will get reboot automatically. Even if iTunes shows any error just ignore it.
STEP 5: now simply exit the recovery mode, and download TinyUmbrella (Windows/Mac). Launch it by clicking on the “Exit Recovery” button. Your Apple device will now restart normally. Last but not the least thing you need to remove the line which you added to the “host” file in step 3, that is 74.208.105.171 gs.apple.com which will enable you to receive updates from Apple’s servers normally.
Now you got back to iOS 4.1, 4.0.2 or 4.0.1 and you can jailbreak your iPhone using our guide. So this is how you can Downgrade iOS 4.3.4 to 4.3.3, 4.3.2, 4.3.1, 4.3, on your iPhone 4, 3GS, iPad 2, iPad, iPod touch.
Also check out below video tutorial that will walk you through how to downgrade from 4.3.4 to 4.3.3:


You may like to read: How to Jailbreak iOS 4.3.4
Read more...

iPad 3 Release Date & Features – Sizzling Rumors

0 comments
iPad 3 release date and features.iPad 3 Release Date & Features
Update (1st July 2011) : Apple is planning to gear up iPad 2 shipments for the third quarter of this year. Does this mean we are not going to see iPad 3 this year? Find out more.
Update (2nd June 2011) : According to DigiTimes, iPad 3 release date should be scheduled to somewhere in 2012. However, Apple has already started certifying process of components for theiPad 3. Here is you will detailed update on iPad 3 release date.
Various sources predict that the iPad 3 release date would be scheduled somewhere in September 2011. The Apple employee said, “They’ve had a number of problems along the way, and the third-generation iPad is the one to make a song and dance about.
John Gruber, an Apple watcher, is supporting the statement by adding that the iPad 3 release date will be in September. He also stated in his blog, “Summer feels like a long time away. If my theory is right, they’re not only going to be months behind the iPad 2, but if they slip until late summer, they might bump up against the release of theiPad 3. And they didn’t only announce this with a distant ship date; they did it with no word on pricing. ” On other hand Apple’s CEO, Steve Jobs says 2011 is the year of the iPad 2.
The Apple iPad 2 is getting such a huge response that Apple is unable to meet the demand. Let us assume that iPad 3 will release in September 2011 in US. However, the UK buyer will get a chance to see iPad 3 after a month or two.
iPad 3 Features Expectation
  • Retina Display: People were expecting a retina display with the iPad 2; but the iPad disappointed them with the same display of the previous iPad. Now followers are waiting for aniPad 3 with a retina display. There is a rumor that the iPad 3 may offer a resolution of 2048×1536 pixels.
  • SD Card Slot: People are expecting a revolution in Apple iPad 3 with an SD card slot. Hopefully Apple may introduce SD card slot with the third generation iPad.
  • Improved HDMI: Yes iPad 2 also supports HDMI playback but you need to have Apple digital AV adapter, and that comes at an additional cost of $39. So it is much expected fromiPad 3 to have an HDMI port that eliminates additional requirement of the HDMI cable.
  • Camera Flash: A camera with flash is a much-waited feature of the iPad; people were expecting iPad 2 to have camera flash; now we would be wondering ifiPad 3 will have camera with flash.
  • Thunderbolt: The iPad 3 may have a Thunderbolt port. That will offer power, video and data connectivity using the same connector at lightning speed.
  • Wireless Synchronize: People are expecting iPad 3 to offer wireless sync of content rather than the traditional wired connectivity.
If you are the iPad owner, then you might want to check out: Best Protective Case for iPad
Read more...

Best Features of iCloud – Revolution in the Cloud

0 comments
Photos, videos, mail, contacts, bookmarks, apps – boy oh boy! iCloud features are simply stunning. No matter what it is, if you are an Apple fan, and have most of their devices, you are going to be stunned at the way iCloud brings complete sync to all your Apple devices.
iCloud FeaturesFor the past few weeks, iCloud is all that is being talked about in the tech gadget circles. Straight from the horses’ mouth, Apple says iCloud is the best content management ever – because you no longer have to worry about managing content ever! In its simplicity, iCloud makes your iPad, iPod, iPhone and all other iDevices synced with each other without you having to do anything. This means, click pictures on your iPad, and in a few moments, you can show them to your colleagues with your iPhone!! The ‘push’ that iCloud does is the best push that Apple has come up with of late. It is syncing at its best – and in its simplest form.
Okay, down to the features. Here’s a pick of what we think are the best features of iCloud.
  • iTunes Music and Apps on iCloud – Purchased music or downloaded apps on your iPad? That’s it, you do not have to purchase them again or download them or transfer them to your iPhone hereafter! With the iCloud pushing all your iTunes purchases and downloads to all other connected iDevices, everything magically appears on your iPhone or even on your Mac or PC! The perfect sync – called ‘push’ by Apple – makes sure every little thing that you want to be available on all your other Apple devices is available right on time!
  • Purchase History – One of the things that was unavailable for all users of iTunes library to buy songs or apps was this special feature – Purchase History. Now you candownload that app you bought again and again by just getting to the Purchase History on your device. The icing on the cake is you can access this from any device no matter which one you used to buy the app or song on iTunes.
  • Photo Stream – Now, we think this is where iCloud’s usage would be felt deeply! People click photos on iPhones a lot. Transferring them to your Mac, or PC, or iPod Touch and other devices is going to be as easy as cinch because you do not have to do anything anymore thanks to iCloud! iCloud just pushes the photos to all your devices that areconnected; makes it as simple as possible to transfer files throughout your devices.
  • Contacts, Bookmarks, Mail and Backup! - Of all the features that are hardest to sync, contacts, calendar, bookmarks and mail are the ones that usually take a lot of time to sync. In fact, most people with multiple devices from Apple usually don’t do this because it is time consuming. With iCloud coming in at the right time and making it possible to sync your bookmarks, contacts and even mail across all the devices, everything now just seems plain simple and easy!

Read more...
 
Mobile phone NEWS © 2011 DheTemplate.com & Main Blogger. Supported by Makeityourring Diamond Engagement Rings

You can add link or short description here